whatsapppopupnewiconGUIDE ME
UI UX Online Course

UI UX Online Course – Become a UI UX Design Expert

UI UX Online Training is a practical course that anyone can easily grasp. The course is designed for beginners, students, fresh graduates, and experienced individuals looking to understand how to design digital products for end-users.
Duration: 4 - 6 Weeks | Mode: Live + Recorded Sessions

UI UX Course Demo Video

From UI UX Course, learners will acquire hands-on skill & learn from experience through project that enable them to learn.

Our Recently Placed UI UX Course Students

Gayathri Nair

Placed at QuantumNest Software

Deepika Reddy

Placed at CodeSprint Technologies

Lakshmi Iyer

Placed at VertexIQ Solutions

Aishwarya Nair

Placed at BluePeak Technologies

Kavya Srinivasan

Placed at CoreVista Technologies

Nithya Menon

Placed at SkyGrid Software

Divya Reddy

Placed at MindForge Labs

Sandeep Reddy

Placed at Infiniq Technologies

About UI UX Online Course

The UI UX Online Training will help learners understand the entire process that is involved in website designing, app designing, and software interface designing. Every step of the design process is described in a simple and practical way. UI UX Online Training helps students to analyze user demands, produce concepts, build layouts, create wireframes, prototypes, and testing before implementing the designs.

UI UX Online Course emphasizes practical learning besides theoretical knowledge so that learners get to grasp how the designs are generated in real world scenarios. As a part of the training process, learners are involved in several design exercises which help them improve their creativity and design thinking. The UI UX Certification Course follows a step-by-step learning strategy which is great for beginners as well as professional designers who want to improve their design skills.

Why UI UX Online Course?
  • Good starting point for learning digital design
  • Helps understand user experience and interface design
  • Covers design processes used in real projects
  • Improves creativity and design thinking skills
  • Helps build professional design portfolios
  • Useful for beginners and working professionals
  • Creates opportunities for design-related job roles

What You Get

  • Live training with trainer support
  • Recorded sessions for revision anytime
  • Hands-on practice with real projects
  • Interview preparation support
  • Placement assistance guidance
  • Resume building support
  • Portfolio creation guidance
  • Practical assignments

Course Design & Approved By

Nasscom & Wipro

What Will You Learn in a UI UX Online Course?

The UI UX Online Course is intended for students who are interested in learning how digital products are developed to be user-friendly.

UI UX Course Exam Overview

  • Category: Beginner to Advanced
  • Level: Beginner to Advanced
  • Duration: Depends on training
  • Type: Practical + Theory
  • Fee: Depends on institute
  • Certification: Available after successfu

Advanced Topics & Use Cases

  • Introduction to UI UX concepts
  • User research fundamentals
  • Design thinking process
  • Information architecture
  • User journey mapping
  • Wireframing techniques
  • Prototyping concepts

Download Curriculum

Get a peek through the entire curriculum designed that ensures Placement Guidance

Course Design By

nasco wp

Course Offered By

Why Choose UI UX Online Training?

  • Live Online UI UX Training
  • Beginner-friendly learning
  • Practical Experience of the Project
  • Design Tools at the Industry Level
  • Help in Portfolio Development
  • Job-Oriented Learning

Benefits You Will Get After Course Completion

  • Understand UI UX concepts clearly
  • Conduct basic user research
  • Create wireframes and prototypes
  • Design user-friendly interfaces
  • Improve user experience workflows
  • Build professional design portfolios
  • Handle UI UX project tasks
Learners Reviews

“I started with no design background. The UI UX Online Training helped me understand everything step by step.”

— Shivam, Fresher

“The Ui Ux Course explained every topic clearly and helped me build strong design knowledge.”

— Jaspal, Software Professional

“This Ui Ux Training Course connected design concepts with practical business requirements and real project scenarios.”

— Surender Sharma, Business Analyst

“The Ui Ux Training helped me learn real design workflows. I now understand how design teams work on projects.”

— Mohan Sharma, Working Professional

“The UI UX Online Course helped me understand design concepts in a practical way. The project work improved my confidence.”

— Bhawani, IT Graduate

“The UI UX Online Training was very easy to understand. I learned how websites and applications are designed from the beginning.”

— Surili Bansal, IT Trainee
Country-wise Job Profiles & Salary Guide

Common Job Roles

  • UI Designer
  • UX Designer
  • Product Designer
  • Interaction Designer
  • UX Researcher

Average Salary Range:

  • INR 4 LPA - INR 8 LPA (Freshers)
  • INR 8 LPA - INR 18 LPA (With experience)
  • Up to 30 LPA (Senior roles)

Common Job Roles

  • UI Designer
  • UX Designer
  • Product Designer
  • User Experience Specialist

Average Salary Range:

  • $75,000 - $95,000 (Entry Level)
  • $100,000 - $140,000 (With experience)
  • $150,000 or more (Senior roles)

Common Job Roles

  • UI Designer
  • UX Designer
  • Product Designer

Average Salary Range:

  • £35,000 - £55,000 (Beginners)
  • £60,000 - £90,000 (With experience)
  • £95,000 and above (Senior roles)

Common Job Roles

  • UI Designer
  • UX Designer
  • Product Designer

Average Salary Range:

  • EUR 55,000 - EUR 80,000 (Entry Level)
  • EUR 80,000 - EUR 110,000 (With experience)
  • EUR 115,000 or More (Senior roles)

Enroll Today

Start your learning journey with our UI UX Online Training and gain practical design skills through live sessions, project-based learning, hands-on assignments.

About the Trainer

The trainer has strong experience in digital design projects and product design workflows. They have worked on multiple projects involving user experience improvement and interface design.
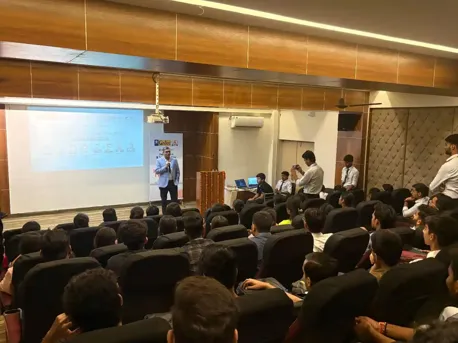
  • Expert trainer with strong UI UX knowledge
  • Worked on real design projects
  • Strong understanding of design workflows
  • Focus on practical learning
  • Guidance for interviews and placement preparation
Frequently Asked Questions

Croma Campus is the well-known UI UX Design Course with Placement in India. We provide training by industry experts.

Croma Campus provides placement-focused UI UX courses by experienced professionals.

No prior experience is typically required for beginner courses. Many programs are designed to cater to all skill levels, including complete beginners.

The duration of courses can vary widely. Some boot camps may last around 9 months, while shorter courses or workshops may take just a few weeks to complete.

Most accredited UI UX courses offer a certificate of completion, which can be beneficial when applying for jobs in the field.

For details information & FREE demo class call us on +91-9711526942 or write to us info@cromacampus.com Address: - G-21, Sector-03, Noida (201301)

Yes, UI UX Online Training is suitable for beginners as well as experienced learners.

No, the UI UX Online Course starts from basic concepts and explains everything step by step.

You can learn user research, wireframing, prototyping, interface design, usability testing, design thinking, and portfolio creation through this Ui Ux Training Course.

Yes, Ui Ux Training is suitable for working professionals who want to improve their design skills.

Yes, the Ui Ux Course With Placement includes interview guidance, resume support, and placement assistance.

CURRICULUM & PROJECTS

UI-UX Training Program

    Module 1: Introduction to Photoshop

    • Moving a Selection from one image to another
    • Correcting Colors
    • Fixing Details with the Clone Stamp Tool
    • Using Adjustment Layers
    • Sharpening the Focus
    • Cropping the Image
    • Text Effects
    • Setting Preferences
    • Choosing Color Settings
    • Customizing Keyboard Shortcuts. Organizing
    • Palettes & Saving Workspaces

    Module 2: Navigation and Resolution . Zooming an Image

    • Scrolling & Panning
    • Changing Resolution & Image Size
    • Using the Navigator Palette
    • Customizing Your View

    Module 3: Rotate and Crop

    • Introducing the Crop Tool
    • Cropping with the Crop Tool
    • Cropping with the Marquee Tool
    • Automating Crop & Straighten
    • Straightening with the Measure Tool
    • Cropping with perspective

    Module 4: Color Correction

    • Basic Color Correction
    • Introducing Variations
    • Adjusting Color with Variations
    • Correcting Color with Variations
    • Using the Fade Command
    • Modifying Colors with Hue/Saturation
    • Specifying Colors in Hue/Saturation
    • Selecting Color Ranges in Hue/Saturation

    Module 5: Painting with the Edit Tools

    • Introducing the Dodge Tool
    • Introducing the Burn Tool
    • Introducing the Sponge & Focus Tools
    • Pushing Pixels with the Smudge Tool

    Module 6: Red Eye Removal and Recolor

    • Correcting Red Eye
    • Using the Red Eye Tool
    • Recoloring with the Brush Tool
    • Using the Color Replacement Tool

    Module 7: Clone, Heal, and Patch

    • Introducing the Clone Stamp Tool
    • Using the Spot Healing Brush Tool
    • The Healing Brush & the Options Bar
    • Healing &Fading
    • Creating Textures & Patterns
    • Using the Patch Tool

    Module 8: Using the Selection Tools

    • Introducing the Selection Tools Ÿ
    • Using the Magic Wand Tool Ÿ
    • Exploring Magic Wand Options Ÿ
    • Using the Grow & Similar Commands Ÿ
    • Selecting with the Polygonal Lasso Tool Ÿ
    • Selecting with the Marquee Tool
    • Saving & Loading a Selection Outline
    • Making a Composite
    • Adding a Drop Shadow
    • Cleaning Up a Selection Edge

    Module 9: Selecting with Color Range

    • Selecting Translucency & Blending mode
    • Defining a Color Range
    • Selecting Image Highlights
    • Compositing Highlights into an Image

    Module 10: Making the Most of History

    • Modifying an Image Using Variations
    • Using the History Brush
    • Understanding History States
    • Choosing History Options
    • Saving Snapshots
    • Fixing Saved Files

    Module 11: Introducing Layers

    • Customizing the Layers Palette
    • Changing the Layer Order, Merging Layers
    • Moving Layers in the Canvas
    • Blending Layers, Creating Adjustment Layer
    • Creating a Clipping Mask
    • Using the Fade Command
    • Using a Levels Adjustment Layer
    • Resizing the Canvas
    • Feathering a Selection to Create a Vignette

    Module 12: Groups and Comps

    • Introducing Layer Groups & Comps
    • Applying Blur & Deleting Layer
    • Working with Layer Groups
    • Modifying a Layer Comp

    Module 13: Opacity and Blend Modes

    • Introducing Opacity & Blend Modes
    • Adjusting the Fill Value
    • Understanding Last Document State
    • Changing Blend Modes with Keyboard Shortcuts
    • Using the Lightening Blend Modes
    • Applying Motion Blur to a Text Layer
    • Updating Layer Comps

    Module 14: Advanced Blending

    • Introducing Advanced Blending
    • Creating a Lens Flare
    • Merging Layers with Screen Mode
    • Merging Blend Modes
    • Adding a Logo Element
    • Grouping & Naming Layers
    • Creating Knockouts
    • Using the Luminance Blend Mode
    • Colorizing a Layer
    • Creating a Knockout from a Layer

    Module 15: Layer Styles

    • Introducing Layer Styles
    • Selecting Layers with Keyboard Shortcuts
    • Applying a Drop Shadow to a Layer Styles.
    • Directional Inner Glow Using Inner Shadow
    • Adjusting Layer Colors
    • Duplicating Layer Effects
    • Working with the Layers Palette
    • Transparency Masking & Painting with Layers
    • Enabling Layer Masks & Effects
    • Adjusting Opacity & Fill inside Layers
    • Saving & Applying a New Layer Style

    Module 16: Masks and Channels

    • Selecting an Image with the Magic Wand Tool
    • Using the Channels Palette & Mixing Channels
    • Choosing a Blend Mode Best Suited for a Mask
    • Using the Variations Tool to Improve a Mask
    • Fixing the Edge of a Mask Using Inner Glow
    • Selecting a Color Channel Best Suited for a Mask
    • Adjusting Levels in a Color Channel
    • Using the Dodge & Burn Tools to Make a Mask
    • Inverting & Combining Channels for Mask Channels Edges
    • Changing the Color of the Rebuilt Overlay
    • Fixing Masks with the Brush Tool
    • Compositing a Masked Image into Another Background
    • Matching the Color Temperature of Images
    • Fixing Mask Edges with Inner Shadow

    Module 17: Transform and Warp

    • Introducing Transformations
    • Masking with the Levels Command
    • Using Free Transform
    • Duplicating Transformations
    • Transforming Selections
    • Masking with Calculations Command
    • Warping an Image
    • Modifying an Image with a Layer Mask

    Module 18: Creating and Editing Type

    • Working with the Pen Tool
    • Introducing Text
    • Editing Text, Creating Point & Area Text
    • Modifying Existing Text
    • Modifying Multiple Text Layers at Once
    • Using Advanced Formatting Options

    Module 19: Special Type Effects

    • Checking Spelling in a Type Layer
    • Warping & Transforming Text
    • Working with Text on a Path
    • Placing Text inside a Path
    • Using Advanced Text Formatting
    • Adjusting Kerning

    Module 20: Vector-based Shapes

    • Resolving Font Issues
    • Advantages of Vector-Based Shapes
    • Introducing the Vitruvian Man & Shapes
    • Introducing the Shape Tools & Fill
    • Applying a Stroke Layer Effect
    • Using the Exclude Overlapping Command
    • Modifying Shape Using Arrow Tools
    • Intersect, Subtract, Add & Combine Path
    • Working with the Polygon Tool
    • Deleting Paths & Drawing a Gradient Arrow
    • Working with Custom Shapes
    • Creating a Custom Shape

    Module 21: Printing and Output

    • Using the Print with Preview Command
    • Output Options. Managing Color
    • Using the Printer Dialog Box
    • Using the Contact Sheet II Command
    • Creating a Picture Package
    • Creating a Web Photo Gallery

    Module 22: Actions

    • Introducing Actions
    • Creating, Loading & Saving Actions
    • Modifying an Action
    • Playing an Action
    • Deleting & Adding Steps in an Action
    • Applying a Gradient Map
    • Correcting Anti-Aliasing
    • Adding a Drop Shadow
    • Testing an Action
    • Final Comments & Credits

    Module 23: Adjusting Levels

    • Using the Brightness/Contrast Command
    • Adjusting Levels Automatically
    • Using the Auto Commands
    • Adjusting Individual Color Channels

    Module 24: Curves, Shadows, & Highlights

    • When Levels Won't Do
    • Introducing Curves
    • Using the Histogram Palette
    • Balancing Color in Curves
    • Working with the Pencil Tool
    • Using the Shadow/Highlight Command

    Module 25: Adjustment Layers

    • Pasting an Image into a Selection
    • Using a Photo Filter Adjustment Layer
    • Adjustment Layer with a Gradient Mask
    • Using a Levels Adjustment Layer
    • Adjustment Layer without a Layer Mask
    • Adding a Layer Mask or a Vector Mask
    • Using a Gradient Map Adjustment Layer
    • Using an Inverse Adjustment Layer

    Module 26: Sharpening Focus

    • Introducing the Sharpen Filters
    • Using Unsharp Mask
    • Understanding working Unsharp Mask Works
    • Sharpening a Low Quality JPEG Image
    • Fading & Blending Unsharp Mask
    • Introducing Smart Sharpen
    • Correcting a Lens Blur with Smart Sharpen
    • Correcting Motion Blur with Smart Sharpen

    Module 27: Blurring and Averaging

    • Using Gaussian Blur, Smart Blur
    • Using the Median & Dust & Scratches Filters
    • Creating Box & Surface Blurs
    • Creating Lens & Shape Blurs
    • Creating Motion & Radial Blurs
    • Removing Stray Hairs Using Median
    • Painting a Blur inside of a Layer Mask
    • Reducing Noise & Restoring Highlights
    • Removing JPEG Artifacts
    • Creating Clouds & Adding a Gradient
    • Creating Stars Using the Add Noise Filter
    • Averaging Colors

    Module 28: Filters and Masks

    • Using the Lens Blur Filter
    • Using a Gradient as a Depth Mask
    • Blending Channels to Create a New Mask
    • Using a Mask to Create a Depth of Field Effect
    • Looking at Different Sharpening Results
    • Applying Multiple Filters to a Layer
    • Creating an Edge Mask to Sharpen an Image
    • Applying Smart Sharpen to an Edge Mask

    Module 29: Distort and Displace

    • Using the Spherize Filter
    • Using the Pinch Filter
    • More Distortion Wackiness
    • Making a Lens Correction
    • Introducing Displacement Maps Displacement Map
    • Understanding Displacement Maps
    • Using the Displace Filter
    • Creating a Displacement Map
    • Making Some one Thinner with a Displacement Map

    Module 30: Liquify

    • Introducing the Liquify Filter
    • Using the Show Backdrop Options
    • Setting Brush Options
    • Warping Images with the Forward Warp Tool
    • Viewing Wireframes with the Show Mesh Command
    • Warping with Other Liquify Tools
    • Restoring & Masking Warped Images
    • Using the Reconstruct Tool to Restore Details
    • Saving & Reloading Wireframe Meshes

    Module 31: Vanishing Point

    • Introducing the Vanishing Point Filter
    • Selecting in Perspective with the Marquee
    • Cloning in Perspective with the Stamp Tool
    • Compositing Images Using Vanishing Point
    • Using Copy Merged in Vanishing Point Tool
    • Fixing Edges with a Black Outer Glow
    • Working with Text in Vanishing Point

    Module 32: Smart Objects

    • Introducing Smart Objects
    • Creating a Smart Object
    • Dynamically Transforming Smart Objects
    • Introduction to Updating Smart Objects
    • Changing the Color of a Transparency Pattern
    • Replacing & Updating Smart Objects
    • Importing Vector Smart Objects
    • Pasting Illustrations as Smart Objects
    • Importing a Raw Image as a Smart Object
    • Final Comments & Credits

    Module 33: Web Application and Animation

    • Defining page setup for web
    • Understanding file formats for web
    • Understanding Pixels & Resolution
    • Creating web patterns
    • Enhancing image for web
    • Creating Web Layout Photoshop
    • Image Maps
    • Image Slicing
    • Creating Web banners
    • Web Animation in Photoshop
    • Converting Photoshop Layout to HTML in
Get full course syllabus in your inbox

    Module 1: Introducing Illustrator

    • Using the Welcome Screen
    • Introducing Vector Based Paths
    • Working with Layers in Illustrator
    • Introducing Anchor Points
    • Creating a New Document
    • Repositioning and Adjusting View
    • Saving the Document
    • Utilizing Illustrator Startup Documents

    Module 2: Workspace & Navigation

    • Setting Up Preferences
    • Using Color Settings
    • Configuring Pallettes & Workspaces
    • Using Navigation

    Module 3: Symetrical Shapes

    • Setting Palette Options and Using Transparency
    • A Look at the Shape Tools Creating a Circle
    • Aligning & Creating Shapes
    • Creating Rectangle Shapes
    • Using the Flip Tool to Mirror Shapes
    • Combining Shapes
    • Tilde Key Function

    Module 4: Fill Stroke and Color

    • Introduction to Fill and Stroke
    • An Overview of the Color Pallette
    • The Color Spectrum Bar and Dialing in colors
    • Black vs Rich Black in the Color Palette
    • CMYK vs RGB
    • Creating and Saving new Color Swatches
    • Filling and Arranging Objects
    • Modifying and Arranging the Stroke of an Object
    • Creating a fill Pattern

    Module 5: Transforming Paths

    • Introducing Path Transformations
    • Duplicating Objects
    • Moving Objects in Increments
    • Using the Reshape Tool
    • Moving Paths
    • Using the Offset Path Dialogue Box
    • Working with Swatches
    • Grouping Paths
    • Using the Scale Tool
    • Using the Rotate Tool
    • Rotating Multiple Objects
    • Advanced Rotate Options

    Module 6: Using the Powerful Pen Tool

    • Using Bridge
    • Creating a Tracing Template
    • Drawing with the Pen Tool
    • Modifying a Path
    • Using and Editing Spline Curves
    • Using Bezier Curves
    • Creating a Cusp Point
    • Modifying and Converting Beziér Curves
    • Cutting, Extending, and Closing Paths
    • Filling Paths

    Module 7: Selecting Points and Paths

    • Strokes and Fills
    • Appearance Palate - Transform And Tweak
    • Working With Layers - Uzz Character
    • Making Use of the Join Command
    • Locked Layers
    • Intro To Pathfinder - Intersect Shape Areas
    • Precision Filling Selection
    • Various Selection Commands & Methods
    • Various Scaling Methods
    • Lacemaking Using Shape Tool - Rotate & Fill
    • Merging Strokes & Fills With Compound Path
    • Lacemaking Using Direction Handles & Anchor Points
    • Pucker & Bloat

    Module 8: Pathfinder Operations

    • Touring the Project
    • An Introduction to the Pathfinder Operations
    • Working with the Pathfinder Palete
    • Comparing Pathfinder Behaviors
    • Joining Paths and the Miter Limit
    • Croping, Uniting and Arranging
    • Selectiing and Deselecting Paths
    • Fill Options and other pathfinder operations

    Module 9: Liquify & Envelope

    • Preparing an Image for Liquify & Envelope
    • Using the Warp Tool to Liquify
    • Using the Envelope Functions
    • Liquify with Live Trace

    Module 10: Gradients & Gradient Mesh

    • Applying a Gradient,Using Swatches
    • Using the Gradient Palette
    • Using the Gradient Slider Bar
    • Adding Colors
    • Using the Gradient Tool
    • Making Color Adjustments
    • Using the Eye Dropper Tool
    • Reviewing the Appearance Palette and Gradients on Strokes
    • Expanding Appearance
    • Creating a Gradient Mesh
    • Expanding a Gradient Mesh
    • Modifying Gradient Mesh Colors
    • Modifying Gradient Mesh Points and Control Handles
    • Applying Other Gradient Mesh Color Change
    • Adjusting Gradient Mesh Preferences
    • Blending Objects into the Gradient Mesh

    Module 11: Blends and Masks

    • Creating Simple Color Gradients
    • Creating Custom Gradients via Blending
    • Cropping Custom Gradient Blends
    • Customizing Blends for Specific Shapes
    • Creating Blends Between Two Shapes
    • Changing the Shape of Customized Blends
    • Masking Edges with Clipping Masks
    • Masking the Shape of Customized Blends
    • Changing Opacities of Clipping Mask Layers

    Module 12: Creating and Formatting Type

    • Importing Text into Illustrator
    • Selecting Text for Reformatting
    • Moving Text to a New Text Container
    • Reformatting Text with the Paragraphs Pallet
    • Altering Text Font and Size
    • Moving Text and Altering Line Spacing
    • Moving Text and Altering Line Spacing

    Module 13: Brushing with Vectors

    • Illustrator CS 2's Brush Tool
    • The Brush Options Dialogue Box
    • Extending Selected Paths
    • Illustrator Art Brushes
    • Editing Your Art Brush Strokes
    • Making a Custom Art Brush
    • Finishing Up Your Art Brush and Typing on a Path
    • Fixing Your Text
    • Converting Text To An Art Brush

    Module 14: Using Transparency

    • Assigning Opacity For Stroke And Fill
    • Working With Knockout Group
    • Creating an Opacity Mask
    • Multiply Mode
    • Adding Objects To Opacity Masks
    • Opacity Mask With a Gradient
    • Blend Mode - Multiply Mode
    • Transpacency Palatte
    • Blend Mode - Color Mode
    • Making Translucent Gradient in Blend Mode
    • Create Mask With Boundary Layer
    • Printing Tips With Flattener Preview

    Module 15: Introducing Live Effects

    • Dealing with Fills and Strokes
    • Using the Scribble Dialogue Box
    • Managing the Appearance Palette
    • Introducing the Transform Command
    • Reapplying the Transform Command
    • Modifying Stroke Attributes
    • Changing the Transform Origin
    • Saving and Loading Graphic Styles

    Module 16: Dynamic Type Treatments

    • Dynamic Effects for Objects
    • Transform Effects and Stacking Order
    • Text Effects, Warnings and Selection Settings
    • Applying the Warp Effect and Editing Text
    • Applying a Stroke and Transforming the Text
    • Thickening the text using Path options
    • Creating Drop shadows & Text Effects
    • Filling Text with Color and Gradients

    Module 17: Live Trace

    • Reviewing Files for Live Trace
    • Using the Live Trace Tool
    • Applying Threshold and Minimum Area
    • Adjustments and View Tracing Option
    • Reviewing Trace Settings Tracing Option
    • Expanding Traced Items to Paths
    • Using Tracing Options for Color
    • Altering Swatches in Color Tracing

    Module 18: Live

    • Live Painting Fills
    • Live Painting Strokes
    • Live Paint-Bucket Basics
    • Live Painting Update On Fly
    • Paint Bucket Tricks
    • Live Painting Paths
    • Leaving Isolation Mode
    • Selecting Paths In Live Paint
    • Selection Tool In Live Paint
    • Layering Strokes In Live Paint
    • Live Painting A Trace
    • Gap Detection
    • Close Gaps With Paths

    Module 19: Using Symbols

    • Introducing Symbols
    • Accessing Symbol Libraries
    • Manipulating and Duplicating Symbols
    • Altering All Instances of a Symbol
    • Replacing All Instances of a Symbol
    • Creating Symbols. Applying Symbols with the Symbol Spray Tool
    • Modifying Symbols with Symbol Tools

    Module 20: 3D Effects

    • Introduction to 3D space and 3D Effects
    • Applying and Adjusting the Extrude and Bevel effect
    • Lighting, Shading and Gradation
    • Mapping the Artwork onto the extruded object
    • Modifying the object and the Mapped artwork
    • Applying and Adjusting the Revolve Effect
    • Using Photoshop to help with 3D Effects

    Module 21: Printing & Exporting

    • Setting Document Trim Size
    • Creating Page Bleed
    • Setting Imageable Portion of Output Page
    • Preparing General Setup Output Settings
    • Preparing Print Bleed Settings
    • Preparing Printer Settings
    • Altering Document Rasterize Settings
    • Saving Print Settings
    • Exporting Documents as Different File Types

    Module 22: Flash Animation

    • Intro To SWF Animation
    • Animating Live Effects
    • Exporting Flash Animations
    • Adding Frames To Animations
    • Creating A Symbol File
    • Animating A Symbol
    • Animating Between 3D Extrusions
Get full course syllabus in your inbox

    Module 1: FIGMA Fundamentals

    • FIGMA Fundamentals
    • Introduction
    • What Is FIGMA
    • Installing & Signing Up For FIGMA
    • Creating A New File
    • Importing
    • Saving Your Work
    • Frames
    • Spacing & Alignment
    • Groups
    • Scaling
    • Components
    • Anatomy Of A FIGMA File
    • Styles
    • FIGMA Keyboard Shortcuts

    Module 2: Learn about FIGMA Interface

    • Learn About FIGMA Interface
    • Browser App Vs Desktop App
    • The Start Screen
    • Introduction To The Interface
    • Importing And Exporting Files
    • Using Templates
    • The Toolbar
    • The Layers And Pages Panel
    • The Assets Panel
    • The Design Panel
    • The Prototype Panel
    • The Code Panel
    • The Canvas
    • Using Keyboard Shortcuts
    • Working With The Version History

    Module 3: Setting up a New Project

    • Setting Up A New Project
    • Creating A New Project And File
    • Importing Sketch Files
    • Working With Teams
    • Working With Templates

    Module 4: Add and Edit Content

    • Add And Edit Content
    • Working With Frames
    • Working With Shapes
    • Drawing Icons Using The Pen Tool
    • Drawing Shapes Using The Pencil Tool
    • Working With Text
    • Masking Images And Shapes
    • Importing Icons And Other Graphics
    • Working With Color
    • Working With Styles
    • Setting Up Components
    • Using Constraints For Responsive Design
    • Working With Version Control

    Module 5: Completing the Design

    • Completing The Design
    • Designing A Slide-Out Menu
    • Designing An On-Screen Overlay
    • Designing A Comments Section
    • Designing Multiple Artboard States
    • Give This Design Its Own Unique Personality

    Module 6: Prototyping, Sharing, and Exporting

    • Prototyping, Sharing, And Exporting
    • Creating A Prototype
    • Viewing Your Prototype On A Mobile Device
    • Device Preview
    • Sharing Your Design
    • Allowing Others To Comment On Your Design
    • Exporting Graphics And Assets

    Module 7: Advanced FIGMA Concepts

    • Advanced FIGMA Concepts
    • Shapes, Icons, And Neumorphic Galore
    • Creating Icons With Shapes
    • Neumorphic Design In FIGMA
    • FIGMA Plugins
    • Time-Saving FIGMA Plugins
    • Isometric Designs, Content, Avatars
    • FIGMA Community Features
Get full course syllabus in your inbox

Get full course syllabus in your inbox

Get full course syllabus in your inbox

Get full course syllabus in your inbox

Get full course syllabus in your inbox

Get full course syllabus in your inbox

Get full course syllabus in your inbox

Get full course syllabus in your inbox

Get full course syllabus in your inbox

Get full course syllabus in your inbox

Get full course syllabus in your inbox

Get full course syllabus in your inbox

Get full course syllabus in your inbox

Get full course syllabus in your inbox

Get full course syllabus in your inbox

Get full course syllabus in your inbox

Get full course syllabus in your inbox

+ More Lessons

Course Design By

naswipro

Nasscom & Wipro

Course Offered By

croma-orange

Croma Campus

Our Students' Projects
1784705420.webp
Deloitte - Dashboard Design Project

Scenario: The design project focused on creating user-friendly dashboards.

Live Work:
  • Planned layouts
  • Organized information
  • Designed screens
  • Built prototypes
  • Reviewed user feedback

Outcome: Dashboard design concepts.

1784705346.webp
Capgemini – Product Design & Prototyping

Scenario: Product design project focused on improving digital user experiences.

Live Work:
  • Planned design workflows
  • Built wireframes
  • Developed prototypes
  • Tested usability
  • Updated designs

Outcome: Product design understanding improved.

1784705186.webp
Accenture – Customer Research Study

Scenario: Research project focused on understanding user needs and behavior.

Live Work:
  • Conducted surveys
  • Collected feedback
  • Analyzed user needs
  • Prepared reports
  • Created user personas

Outcome: User research concepts became clear.

1784705120.webp
TCS - Corporate Website Revamp Project

Scenario: Website redesign focused on improving user experience and navigation.

Live Work:
  • Analyzed user requirements
  • Created wireframes
  • Improved layouts
  • Designed prototypes
  • Tested user interactions

Outcome: Website design understanding improved.

1784704633.webp
Infosys - Mobile App Design Project

Scenario: Design project focused on creating user-friendly mobile application interfaces.

Live Work:
  • Conducted user research
  • Created wireframes
  • Designed application screens
  • Developed prototypes
  • Improved user flow

Outcome: Understanding of mobile design improved clearly.

Recent UI UX Course Job Requirements
Product Design Trainee

Company: Capgemini

Location: Hyderabad

Experience: 1–3 Years

Required Skills: Ui Ux Course, Interface Design

UX Associate

Company: Infosys

Location: Pune

Experience: 0–2 Years

Required Skills: User Research, Design Thinking

Junior UI Designer

Company: TCS

Location: Bangalore

Experience: 0–2 years

Required Skills: UI UX Online Training, Wireframing

×

For Voice Call

+91-971 152 6942

For Whatsapp Call & Chat

+91-9711526942
newwhatsapp
1
//